Following along: typecraft's Neovim for newbs part 1
What began as a post on installing GitHub locally turned into a multipart post on following typecraft’s guide to nvim, so while I eventually get around to installing the CLI tools, this is elmost entirely about typecraft’s guide. I kept the part about GitHub in so I can re-use it later.
Starting with me wanting to get GitHub’s CLI installed:
Prior to looking at the Packages page on the official Arch Linux site, I made sure the system’s UTD:
sudo pacman -Syu
It wasn’t (is an Arch machine every truly UTD?) so I installed the updated packages. With that out of the way, we find The GitHub CLI repo on the Packages page here and run
sudo pacman -S github-cli
From there, I create a dir in for repos with
mkdir -p ~/repos
The -p option prevents the No such file or directory error because we are making a directory requiring a parent directory which doesn’t exist, either. That is, -p is for making nested dirs.
With the dirs created, I cd in and
git clone https://github.com/belmead/hugo-blog.git
Which put the repo files in the hugo-blog dir I made. This was a backwards way of doing things - I didn’t know that cloning the repo creates a dir with the repo name, so the mkdir -p command was unecessary. In hindsight, this should have been obvious.
git status shows I am on the UTD origin-main branch with nothing to commit.
Pause for nvim
I mistakenly assumed I have nvim installed on this system - turns out I’d been using nano previously. Shameful. I’d been meaning to use typecraft’s nvim guide for a while now, so this seemed like the perfect time to do so. This is now an nvim post.
typecraft said,
Now, who is this series for? It’s for those of you who are least somewhat familiar with vim and newvim and you just want to take configuration to that next level and take your understanding of that configuration to the next level.
I can barely use nvim on my own (open files, read files, write new data, save files, exit) and I certainly have never made a config file, so. Might not be the best starting point, but installing and writing config files for nvim seems like a good use of a Sunday, so:
Install nvim
Easy enough:
sudo pacman -S neovim
A quick dip inside with nvim shows the package is UTD, so good to go. :q to exit.
init.lua
The scripting language Lua has a runtime built into to nvim, per typecraft, so that’s neat. Looking forward to learning some Lua here. I do best with scripting languages, after all. Dotfiles live in the home directory - I know that much - and per Max Shen, it needs to be in `~/.config/nvim/’, a dir that doesn’t exist, so
mkdir ~/.config/nvim
Followed by
touch init.lua
Which creates the file. I love the touch command, so useful. So now we begin writing to the file in nvim with
nvim init.lua
typecraft writes the file on opening with :w, which I don’t understand the point of, but I ran with it.
set expandtab
set tabstop=2
set softtabstop=2
set shiftwidth=2
The above control spacing and tab behavior. I write out with :w and then run :source % which results in
Error detected while processing /home/.../.config/nvim/init.lua: E5112: Error while creating lua chunk: /home/.../.config/nvim/lua.init:1 '=' expected near 'expandtab'
Which was expected. typecraft explains:
Wait a minute, we have an error - why did that happen? Because this isn’t a vimscript file, this is Lua. We do not write Vim script code in a Lua file. That’s ridiculous.
I’ll take his word on that, since I am not familiar with either. I’m going to assume this means that :source % expects a vimscript file and sees lua instead and so errors out. typecraft goes on to say:
So how do we set Vim variables and configurations from within a Lua file? Well, it’s done using things called meta accessors (or functions) that expose Vim’s lower-level APIs to the Lua runtime within neovim, but for us, what we’re going to want to use is the vim.cmd function, and what that does is it allows us to run any kind of Vim command within the string that comes after this function declaration, so let’s call that.
He refers to nanotee’s nvim Lua guide for this bit. I don’t quite grok what is happening here, so I asked ‘Plex:
To set Vim variables and configurations from a Lua file in Neovim, you can use the vim.cmd function. This function allows you to run Vim commands from within Lua code.
That’s what we end up doing, and since multiple lines of Lua are involved, we write a macro and get:
vim.cmd("set expandtab")
vim.cmd("set tabstop=2")
vim.cmd("set softtabstop=2")
vim.cmd("set shiftwidth=2")
I’ve never written a macro, and it took far longer to figure it out than it would have been to just manually write the changes out, but now I know how to write a macro. Very powerful, and if I can remember how to do it later, it’ll be a powerufl tool. Save with :w and source with :source % which no longer returns an error. Neat.
Package manager: lazy.nvim
This is less esoteric than the above, as I work with package managers often enough (pacman on my Arch machine, brew at work). That is to say, at least I understand the “what” and “why” behind the thing. The concept of a package manager for a specific program is interesting. Getting lazynvim requires copy and pasting into the init.lua file. The repo with the code typecraft refers to is folke’s lazy.nvim but the maintainer moved the install instructions here. The outcome using the Single File Setup is:
vim.cmd("set expandtab")
vim.cmd("set tabstop=2")
vim.cmd("set softtabstop=2")
vim.cmd("set shiftwidth=2")

-- Bootstrap lazy.nvim
local lazypath = vim.fn.stdpath("data") .. "/lazy/lazy.nvim"
if not (vim.uv or vim.loop).fs_stat(lazypath) then
  local lazyrepo = "https://github.com/folke/lazy.nvim.git"
  local out = vim.fn.system({ "git", "clone", "--filter=blob:none", "--branch=stable", lazyrepo, lazypath })
  if vim.v.shell_error ~= 0 then
    vim.api.nvim_echo({
      { "Failed to clone lazy.nvim:\n", "ErrorMsg" },
      { out, "WarningMsg" },
      { "\nPress any key to exit..." },
    }, true, {})
    vim.fn.getchar()
    os.exit(1)
  end
end
vim.opt.rtp:prepend(lazypath)
A bit opaque (I’m not used to Lua’s if-then statements). Per typecraft,
So essentially this little snippet just says, “Hey, does this thing exist on the system yet? If not, we’ll clone the repository, and then we’re good to go.”
We add a few more lines below (this is where the official Lazy install doc diverges from typecraft’s guide. The install document has some different code, but I’m following typecraft. If it breaks, I’ll refer to the doc. The lines:
local plugins = {}
local opts = {}

require("lazy").setup(plugins, opts)
After saving, running :Lazy gets us:
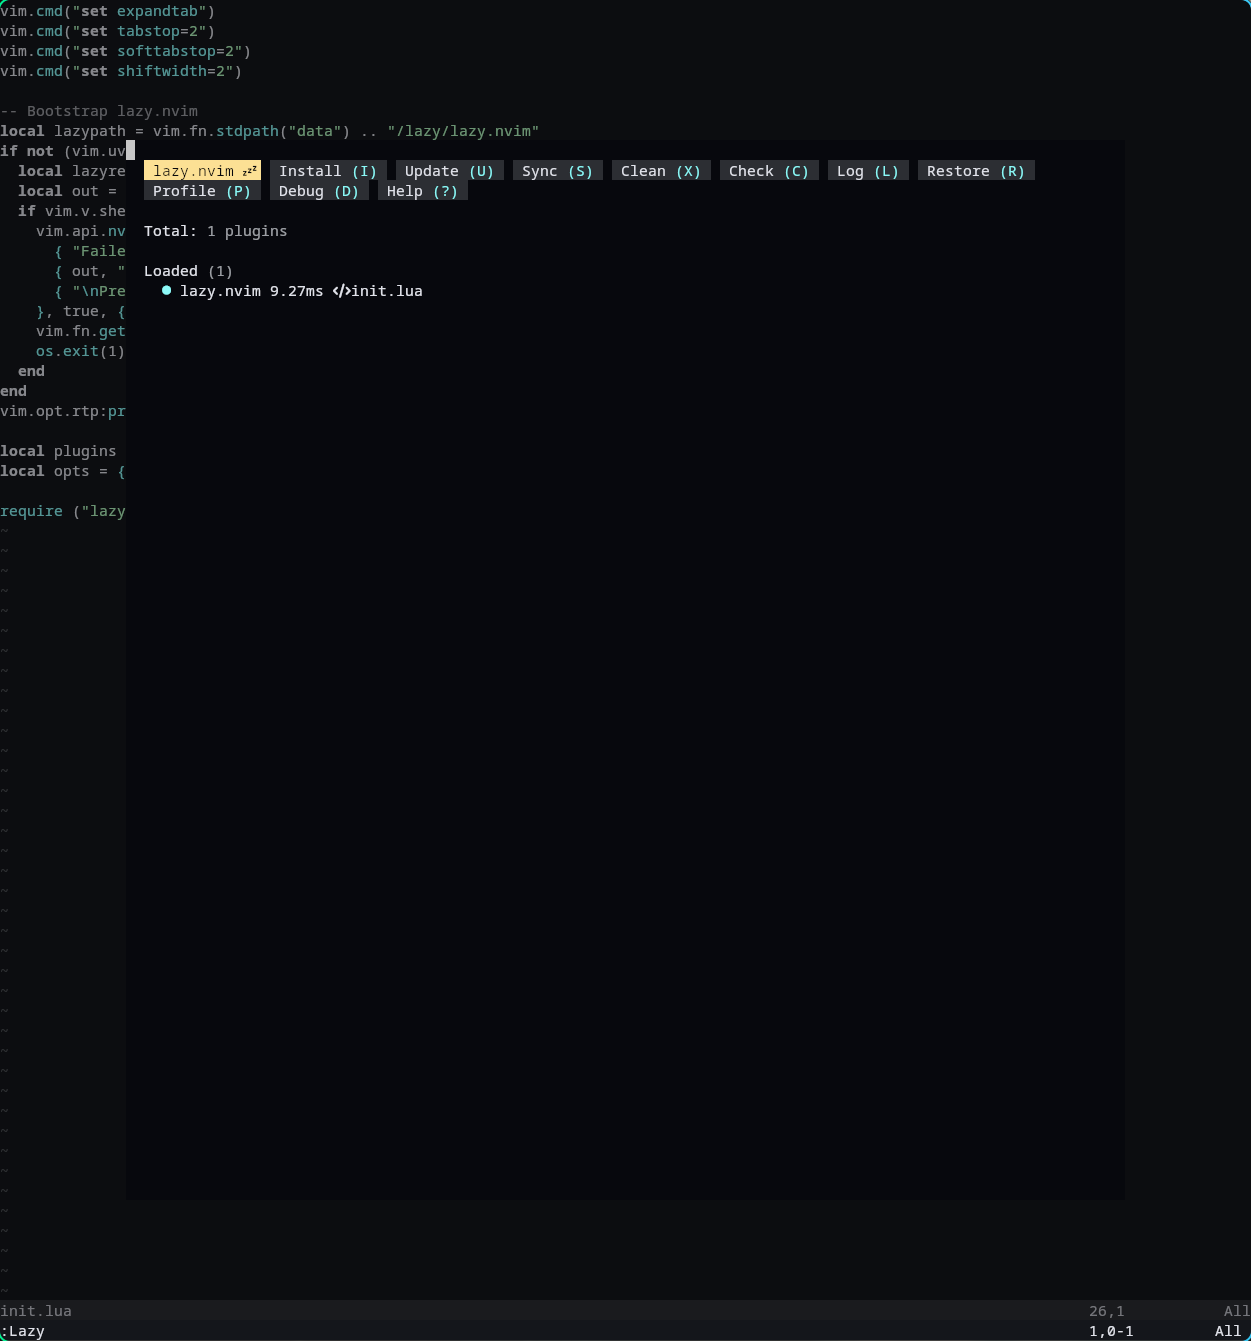 Lazy running in nvim with
 :Lazy
Color scheme (catpucchin)
The link to the catppuccin repo is here. The line
{ "catppuccin/nvim", name = "catppuccin", priority = 1000 }
goes into the local plugins table (local plugins = {}):
local plugins = {
  { "catppuccin/nvim", name = "catppuccin", priority = 1000 }
}
local opts = {}
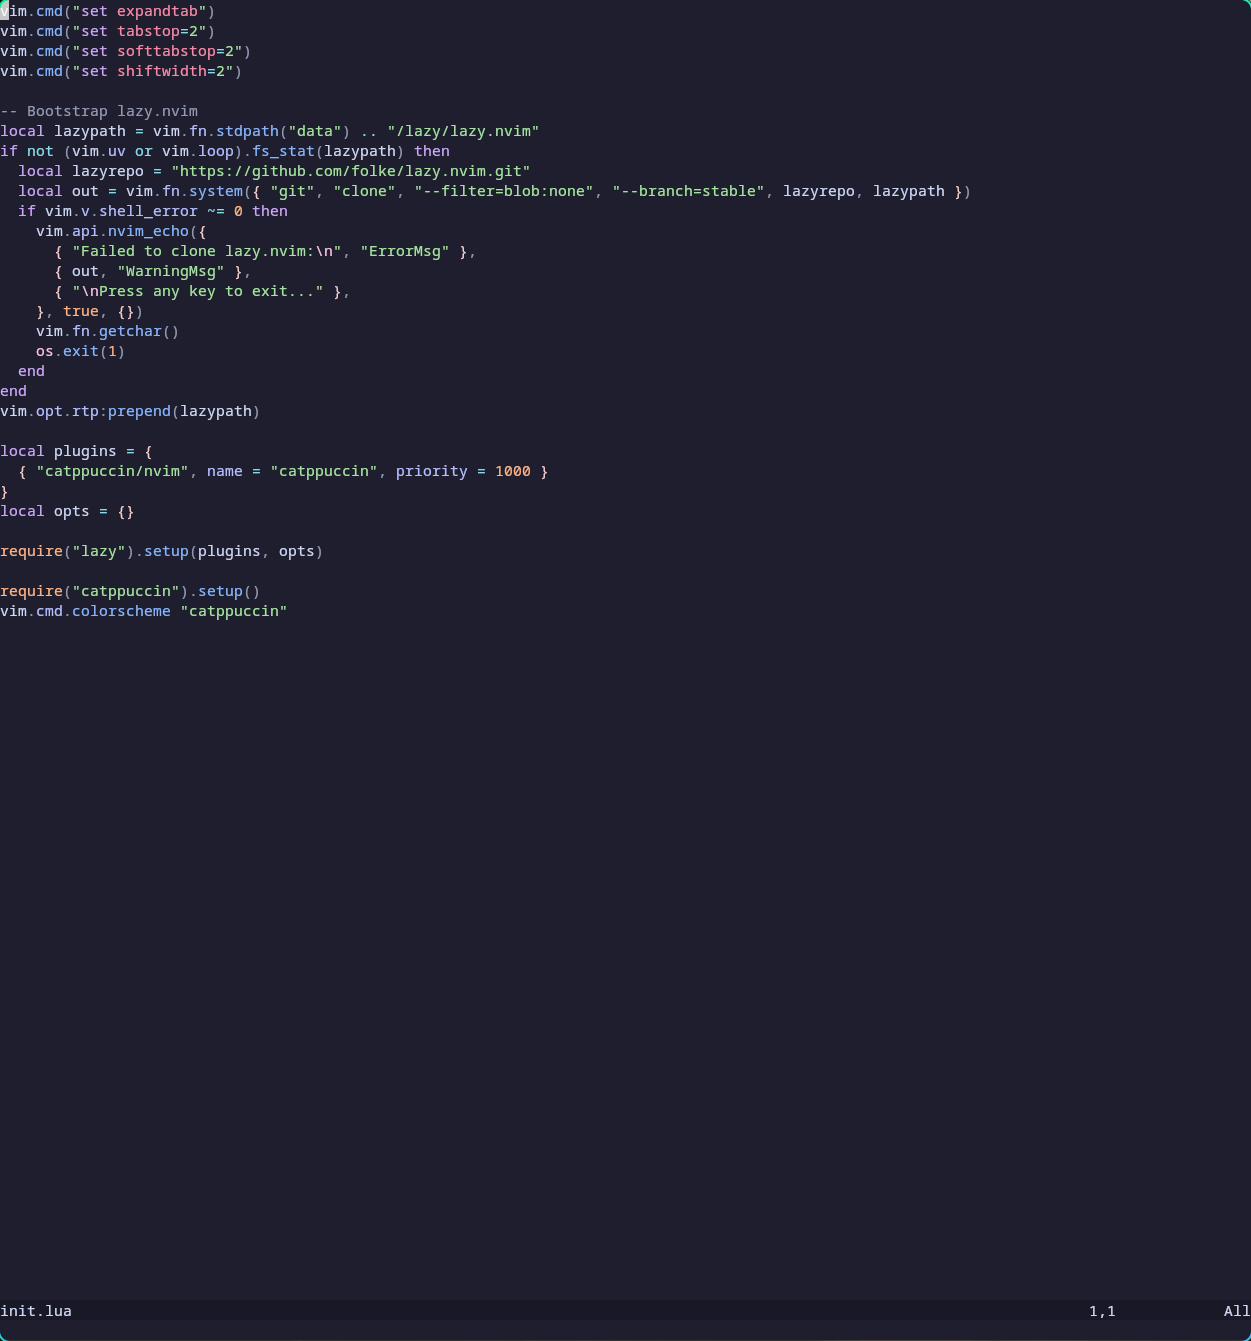
Save, exit, and run nvim gets me:

Evidently this is not catppuccin, and I need to call it with a function so the nvim Lua runtime knows what to do with it:
require("lazy").setup(plugins, opts)

require("catppuccin").setup()
vim.cmd.colorscheme "catppuccin"
No change to the require("lazy").setup(plugins, opts) bit, I only included it as a location marker.
Fuzzy finding and grepping with Telescope
Per typecraft,
Telescope is unbelievable. It’s an amazing plugin - it enables you, in your neovim configuration, to fuzzy find based on the name of files. It allows you to
grepthrough all your files to look for specific strings throughout your project, and tons and tons and tons of other stuff.
You may find the repo here. This requires more table editing:
local plugins = {
  { "catppuccin/nvim", name = "catppuccin", priority = 1000 },
  {
    'nvim-telescope/telescope.nvim', tag = '0.1.8',
    dependencies = { 'nvim-lua/plenary.nvim' }
  }
}
Save, exit, and run nvim gets me:
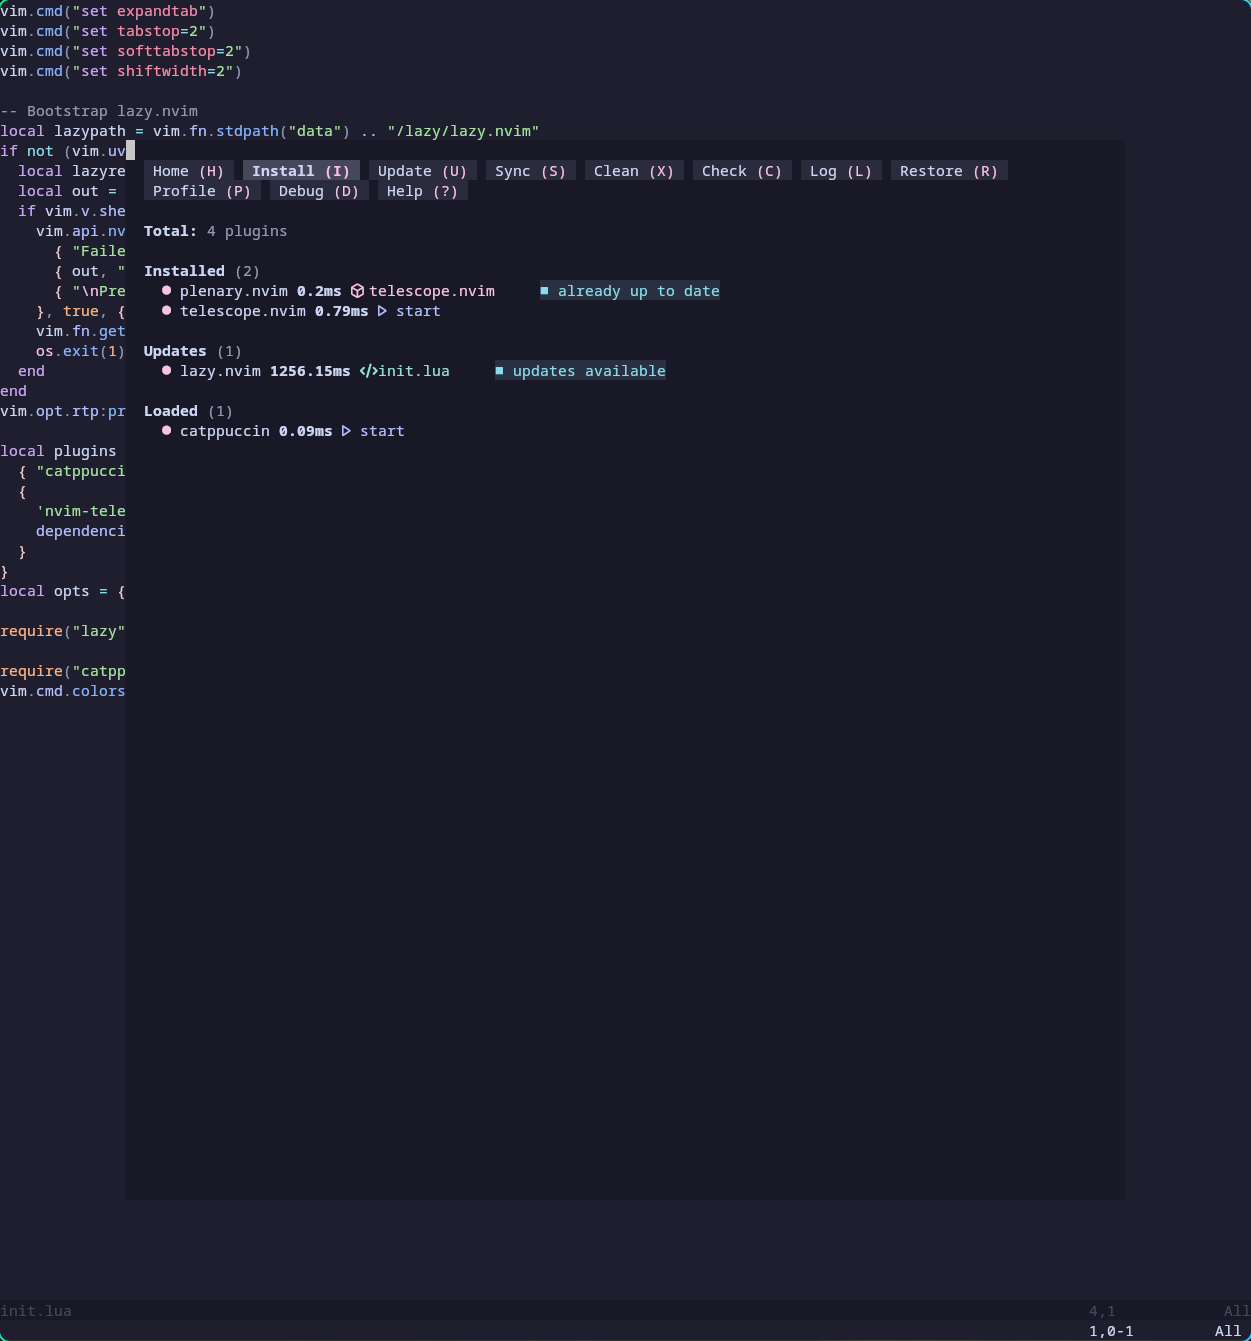 Lazy installing Telescope and Plenary
Very cool. Next, we install a local variable called builtin:
require("lazy").setup(plugins, opts)

local builtin = require("telescope.builtin")
Per typecraft,
What this is going to do is, it’s going to load up all of the stuff in the Lua file within the module
telescope.builtin.
So we edit thusly:
require("lazy").setup(plugins, opts)

local builtin = require("telescope.builtin")
vim.keymap.set('n', '<C-p>', builtin.find_files(), {})
This is a function in the built-in module for Telescope and it allow us to use fuzzy find to find files in our project.
Now I can find files with ctrl+P:
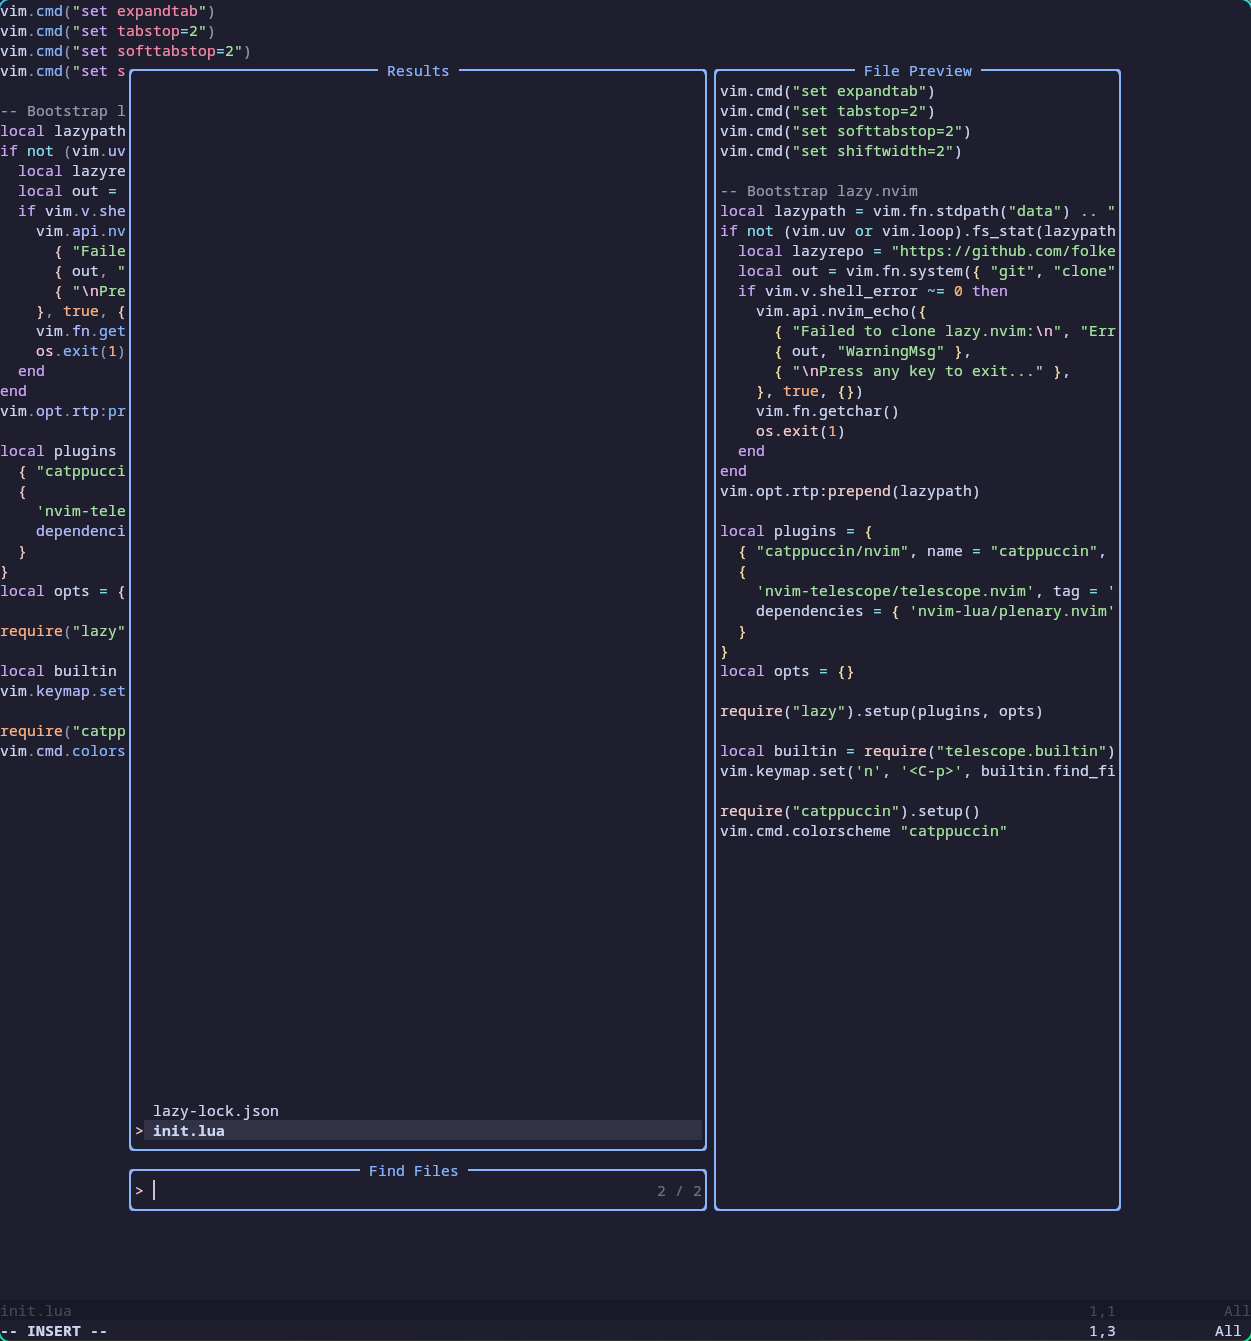 Finding files with Telescope
Neat. To live grep, we add the following below the last keymap line:
vim.keymap.set('n', '<leader>fg', builtin.live_grep, {})
leader is undefined, so at the top, under vim.cmd("set shiftwidth=2"), we add:
vim.g.mapleader = " "
After running :source and saving, we can use live grep with space+fg:
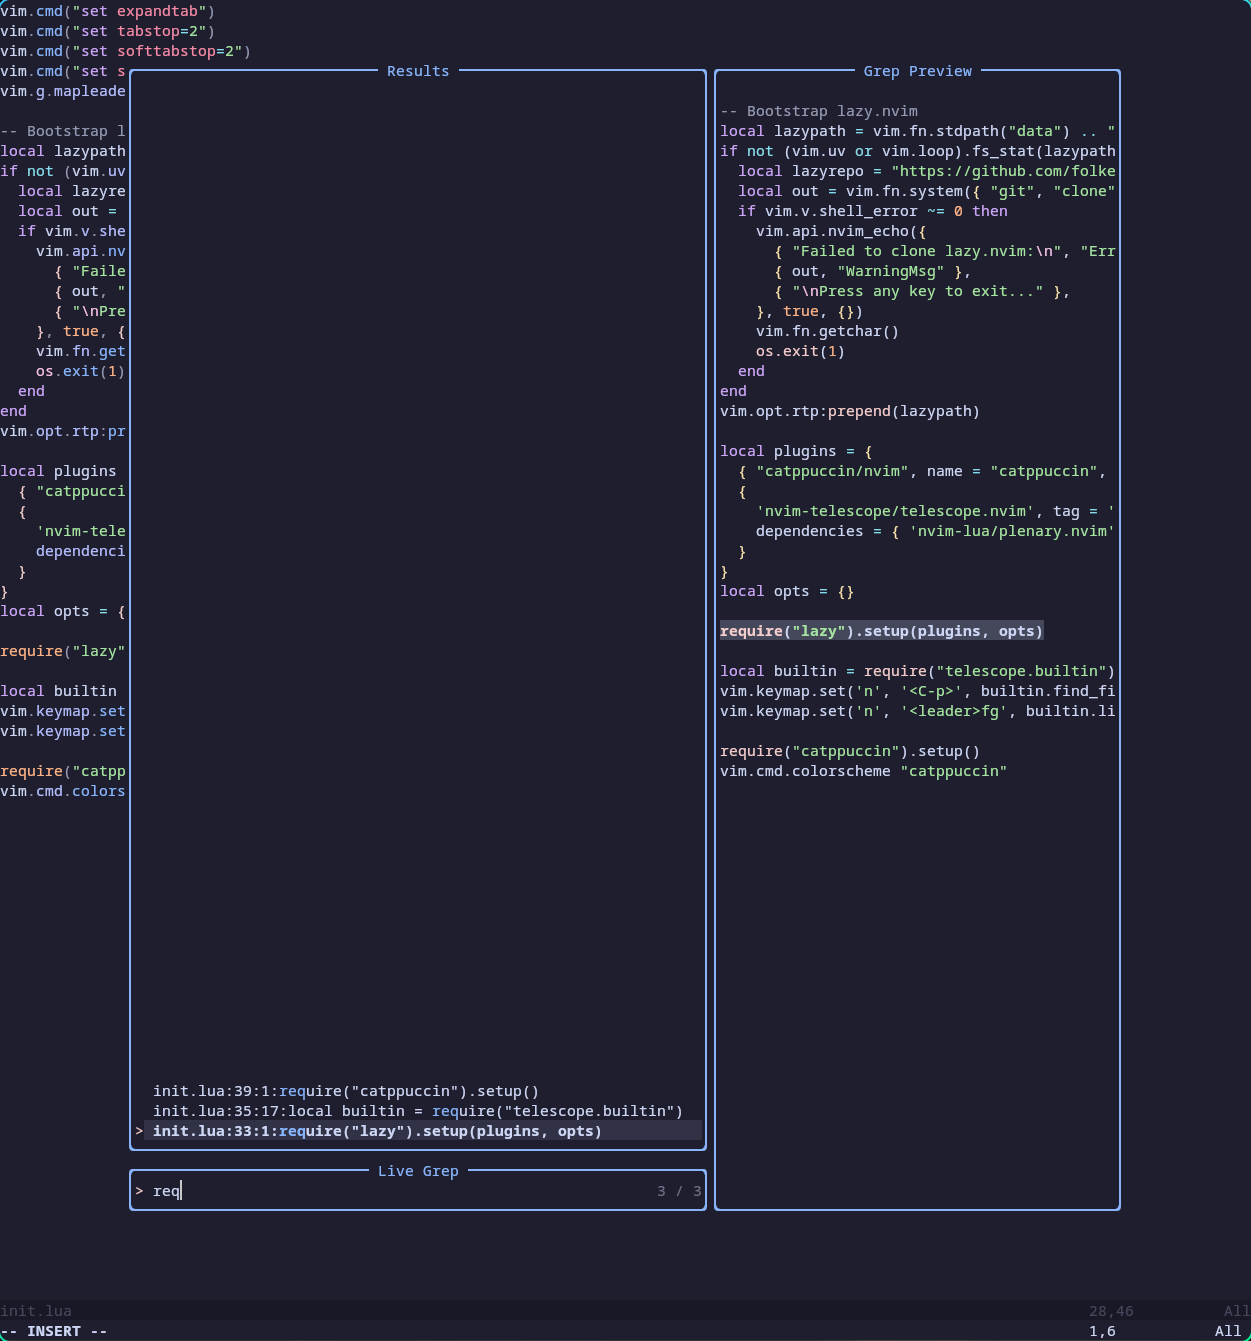 Live
Live grep in nvim
nvim-treesitter
I used the repo at nvim-treesitter and the install wiki here. Per the repo, nvim-treesitter:
The goal of nvim-treesitter is both to provide a simple and easy way to use the interface for tree-sitter in Neovim and to provide some basic functionality such as highlighting based on it.
So what does treesitter do?
Tree-sitter is a parser generator tool and an incremental parsing library. It can build a concrete syntax tree for a source file and efficiently update the syntax tree as the source file is edited. repo
So nvim-treesitter helps us use tree-sitter. Very confusing. I think it’s a text highlighter. Back in init.lua, we add to our list of plugins:
require("lazy").setup({{"nvim-treesitter/nvim-treesitter", build = ":TSUpdate"}})
Below the keymap setting for live grep, we add:
local config = require("nvim-treesitter.configs")
config.setup({
  ensure_installed = {"lua", "python"},
  highlight = { enable = true },
  indent = { enable = true },
})
typecraft went for JS, but I mostly fool around in Python, so I added that instead.
That’s the end of the first video in the 6-part series. To recap, we:
- installed nvim
- Created out config file, init.lua
- Installed a package manager
- Installed packages
catppuccin,telescope. andnvim-treesitter
Up next: part 2